Android Studio Tutorial for Beginners
If you are new to Android development and want to learn how to create your own apps, this tutorial is for you. In this tutorial, you will learn how to use Android Studio, the official integrated development environment (IDE) for Android, to create a simple app that displays a message on the screen. You will also learn some basic concepts and skills of Android development, such as creating layouts, adding widgets, running and debugging your app, and more.

Welcome to this Android Studio tutorial for beginners. In this post, I will show you how to create a simple Android app using the official integrated development environment (IDE) for Android development. Android Studio is a powerful tool that helps you design, code, test, and debug your apps. By the end of this tutorial, you will have a basic understanding of how to use Android Studio and how to build your first app.
Before we start, you need to have some prerequisites:
- A computer running Windows, Mac OS, or Linux
- The latest version of Android Studio installed on your computer
- An Android device or emulator to run your app
If you don't have these, you can follow the instructions on the official Android website to set them up.
Step 1: Create a new project
To create a new project in Android Studio, open the program and select "Start a new Android Studio project" from the welcome screen. Alternatively, you can go to File > New > New Project from the menu bar.
You will see a dialog box where you can choose the type of project you want to create. For this tutorial, we will select "Empty Activity" which is a template for a basic app with one screen. Click Next.
On the next screen, you can name your app and choose the package name, which is a unique identifier for your app. You can also select the minimum SDK version, which is the lowest version of Android that your app can run on. For this tutorial, we will use API 21: Android 5.0 (Lollipop) as the minimum SDK. Click Next.
On the final screen, you can choose the name and location of your activity and layout files. An activity is a component that represents a single screen in your app, and a layout is a file that defines the user interface of your activity. For this tutorial, we will use the default names: MainActivity and activity_main. Click Finish.
Android Studio will create your project and open it in the main window. You will see two tabs at the top: Design and Text. The Design tab shows you a preview of how your app looks on a device or emulator, and the Text tab shows you the XML code that defines your layout. You can switch between them by clicking on them.
Step 2: Add a button to your layout
To make our app more interactive, we will add a button to our layout that will display a message when clicked. To do this, we need to edit our layout file: activity_main.xml.
In the Design tab, you will see a palette of widgets that you can drag and drop onto your layout. A widget is a UI element that displays some information or performs some action, such as a button, a text view, an image view, etc.
Find the Button widget in the palette and drag it onto your layout. You can position it anywhere you want by dragging it around. You can also resize it by dragging its edges or corners.
You will notice that as you move or resize your button, some blue lines and dots appear on the layout. These are called constraints, and they define how your button is aligned relative to other elements or the edges of the screen. Constraints are important because they ensure that your layout adapts to different screen sizes and orientations.
To add constraints to your button, click on it and then drag one of the circular handles to another element or edge. You will see a line connecting them, indicating that they are constrained. For example, you can drag the left handle of your button to the left edge of the screen, and the top handle of your button to the top edge of the screen. This will make your button stay at the top left corner of the screen.
You can also edit the properties of your button by clicking on it and then looking at the Attributes panel on the right side of the window. Here you can change things like the text, color, size, font, etc. of your button. For example, you can change the text of your button from "Button" to "Click Me".
Step 3: Add some logic to your activity
Now that we have added a button to our layout, we need to add some logic to our activity that will make it do something when clicked. To do this, we need to edit our Java file: MainActivity.java.
In Android Studio, open MainActivity.java by double-clicking on it in the Project panel on the left side of the window. You will see some code that was generated for you by Android Studio.
The most important part of this code is the onCreate method, which is called when your activity is created. This is where you initialize your UI elements and set up any listeners or adapters that handle user input or data changes.
To make our button display a message when clicked, we need to do two things:
- Find our button by its ID and assign it to a variable
- Set an OnClickListener on our button that will execute some code when the button is clicked
To find our button by its ID, we use the findViewById method, which takes an integer parameter that represents the ID of the widget we want to find. The ID of our button is R.id.button, which is automatically generated for us by Android Studio when we added the button to our layout. We can assign the result of this method to a Button variable, like this:
Button button = findViewById(R.id.button);
To set an OnClickListener on our button, we use the setOnClickListener method, which takes an OnClickListener object as a parameter. An OnClickListener is an interface that defines a single method: onClick, which is called when the view that has the listener attached is clicked. We can create an anonymous inner class that implements this interface and override the onClick method, like this:
button.setOnClickListener(new View.OnClickListener() {
    @Override
    public void onClick(View v) {
        // code to execute when the button is clicked
    }
});
Inside the onClick method, we can write any code that we want to execute when the button is clicked. For this tutorial, we will use a Toast to display a message on the screen. A Toast is a simple UI element that shows a short message for a brief period of time. To create and show a Toast, we use the static makeText and show methods of the Toast class, like this:
Toast.makeText(MainActivity.this, "You clicked the button!", Toast.LENGTH_SHORT).show();
The makeText method takes three parameters: a context, a text, and a duration. The context is usually the activity that creates the Toast, which we can refer to as MainActivity.this. The text is the message that we want to display, which can be a string literal or a string resource. The duration is either Toast.LENGTH_SHORT or Toast.LENGTH_LONG, depending on how long we want the message to stay on the screen. The show method displays the Toast on the screen.
The final code of our onCreate method should look like this:
@Override
protected void onCreate(Bundle savedInstanceState) {
    super.onCreate(savedInstanceState);
    setContentView(R.layout.activity_main);

    Button button = findViewById(R.id.button);
    button.setOnClickListener(new View.OnClickListener() {
        @Override
        public void onClick(View v) {
            Toast.makeText(MainActivity.this, "You clicked the button!", Toast.LENGTH_SHORT).show();
        }
    });
}
Step 4: Run your app
Now that we have completed our app, we can run it on an emulator or a real device. To do this, click on the green Run button on the toolbar or press Shift + F10. You will see a dialog box where you can choose the device or emulator that you want to run your app on. If you don't have any devices or emulators configured, you can follow the instructions on the official Android website to set them up.
Once you select your device or emulator and click OK, Android Studio will build and install your app on it and launch it. You should see your app running on your device or emulator with a button that says "Click Me". If you click on it, you should see a message that says "You clicked the button!".
Congratulations! You have successfully created your first Android app using Android Studio!
I hope you enjoyed this tutorial and learned something new. If you have any questions or feedback, please leave them in the comments below. Thank you for reading!
Share This Post
 for Android, to create a simple app that displays a message on the screen. You will also learn some basic concepts and skills of Android development, such as creating layouts, adding widgets, running and debugging your app, and more.&media=https://pagefist.com/uploads/blog_post_images/Tutorial%20for%20Beginners.jpg)
Related Articles

Develop iPhone App and Become an IOS Mobile App Developer
If you want to develop an iPhone app, you need to have some basic skills and tools. First, you need to know how to code in Swift, the official programming language for iOS. Swift is a modern and powerful language that lets you create fast and responsive apps. Second, you need to have a Mac computer and Xcode, the integrated development environment (IDE) for iOS. Xcode is where you write, test, debug, and deploy your app. Third, you need to have an Apple Developer account and a device to test your app on. An Apple Developer account lets you access the App Store, where you can distribute your app to millions of users. A device, such as an iPhone or an iPad, lets you see how your app looks and works on a real screen.
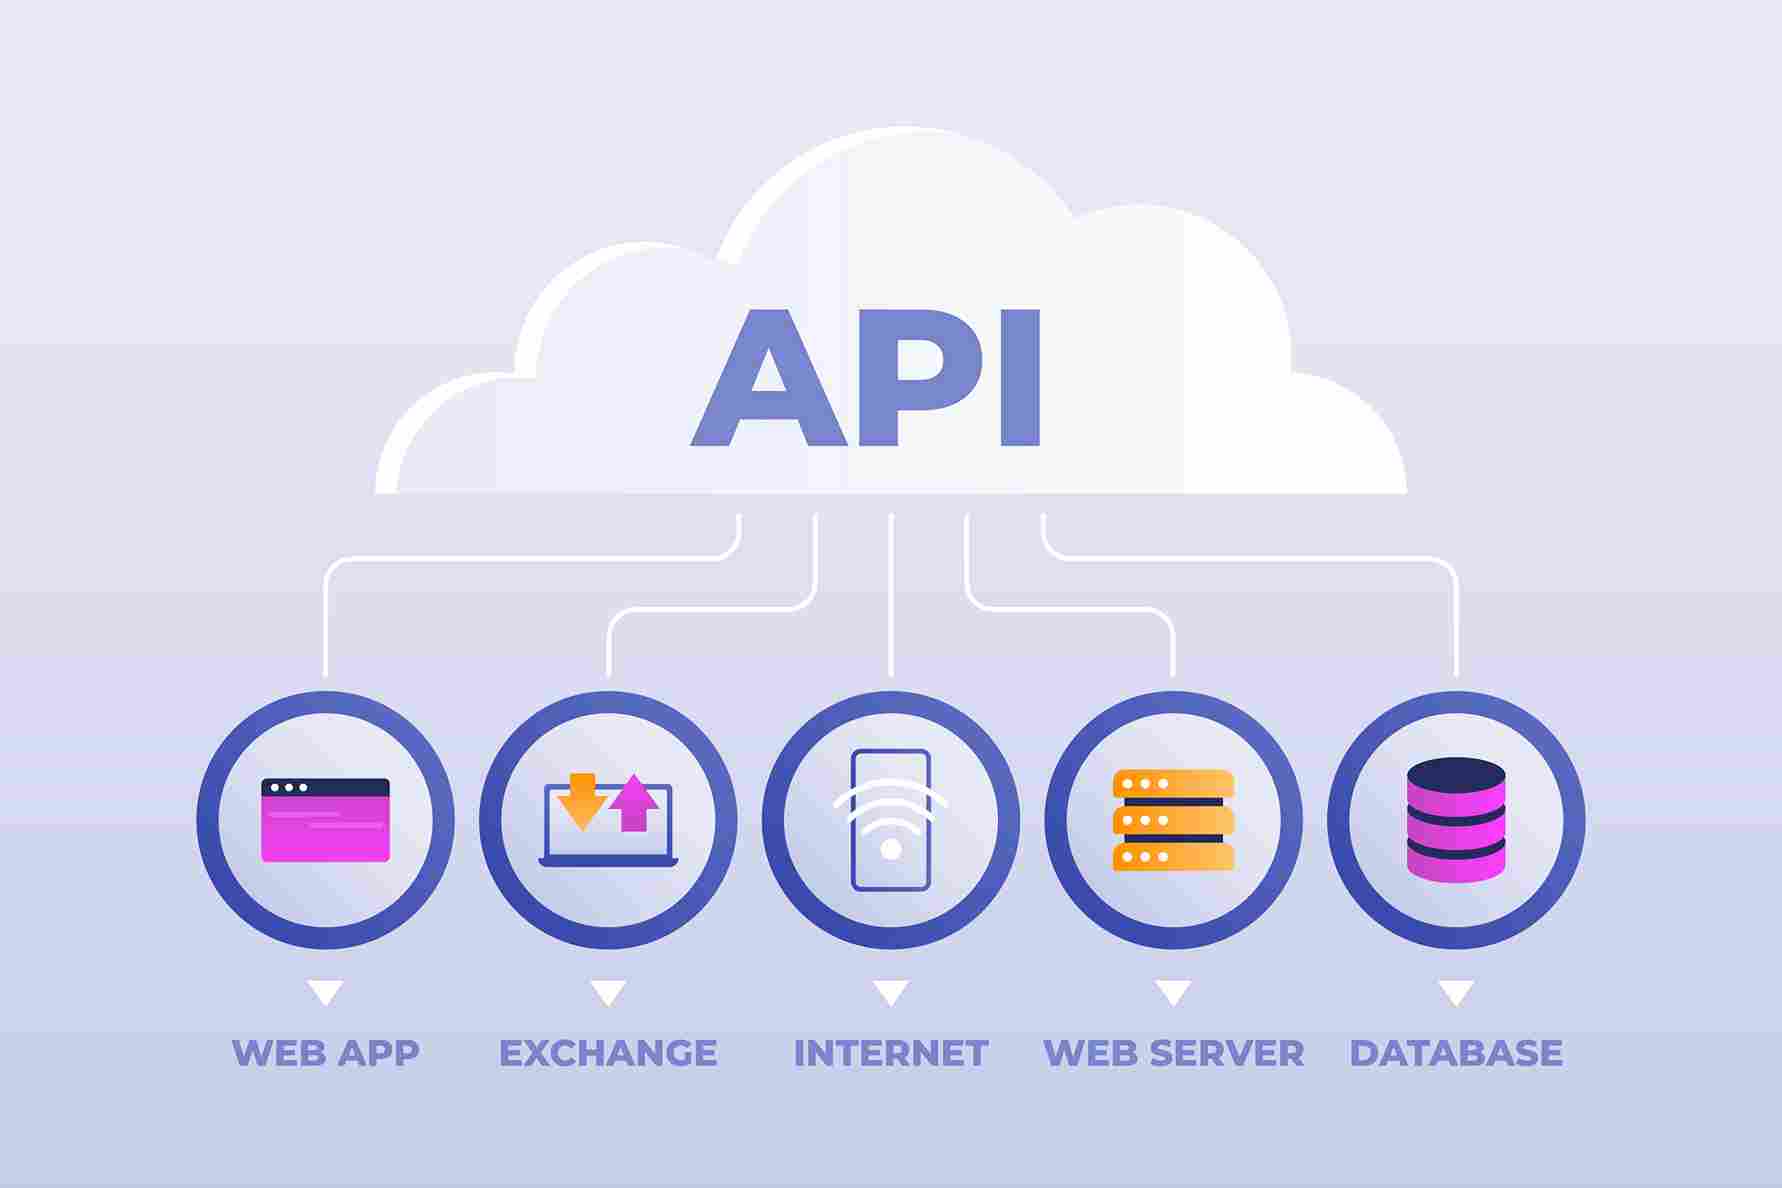
What is API and what use of API for app development?
API stands for Application Programming Interface. It is a set of rules and protocols that allow different software components to communicate and exchange data. APIs are essential for app development because they enable developers to access functionalities and resources from other applications or platforms, such as maps, payment systems, social media, etc. APIs also simplify the coding process and reduce development time and cost.

App Development Company in India
PAGEFIST is a leading app development company in India that offers innovative solutions for various platforms and industries. We have a team of experienced and skilled developers who can create custom apps that meet your specific needs and expectations. Whether you need an app for iOS, Android, web, or hybrid, we can deliver it with high quality and efficiency. We also provide app maintenance and support services to ensure your app runs smoothly and securely. Contact us today to get a free quote and consultation for your app project.

What is Flutter Framework?
Flutter is a cross-platform framework that allows developers to create applications for different operating systems, such as Android, iOS, Windows, Linux, and Mac. Flutter uses a single codebase and a declarative UI approach to simplify the development process and improve the performance and quality of the applications. Flutter also supports hot reload and hot restart features, which enable faster iterations and debugging.

App Development Ethics: Balancing Innovation and Responsibility
Dive into the world of app development ethics, where innovation and responsibility intersect. Explore the challenges, dilemmas, and solutions in this ever-evolving digital landscape.
Related FAQ
No related FAQ.
Say Hello
To Your Dream
- About
- Privacy Policy
- Terms of Service
- Terms and Conditions
- Cancellation and refund
- Shipping and delivery
- Contact Us
- Blog
- Products
- For Startups Support
- Pages
- FAQ
- Thanks and Credits